-
192.168.188.1 is the IP address that is common to all. All the devices used to have the main IP address and alternative IP address as well. It is so because if one doesn’t work, then the other can help. So, the IP 192.168.188.1 either will be the main IP address for the extender or the alternative one. So, it is important to know about the steps to complete 192.168.188.1 Access. With 192.168.188.1 admin setup, you can configure your network.
Steps To Access 192.168.188.1 Login
Following the right steps is always used to make the setup process easy. Therefore, it becomes very important to go with the right procedure as skipping one step can create trouble.
In the following steps, the every minor delta is covered to help you with 192.168.188.1 Wireless Extender Setup:
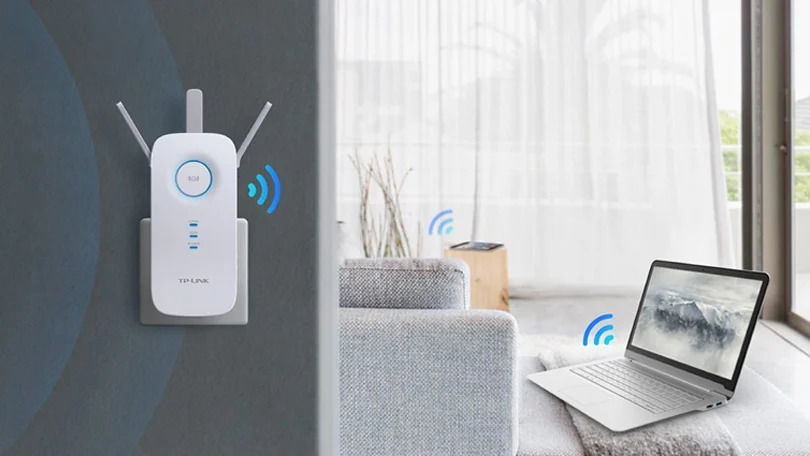
Step 1: First, plug in your wireless extender to the power source.
Step 2: Make sure you are connecting the extender near to the router or in the same room for the setup procedure.
Step 3: Now, connect your system with the extender’s network either via wireless method or via ethernet cable.
Step 4: On using the wireless method, use the default password mentioned on the extender if the prompt asks on connection.
Step 5: Now, open Google Chrome, or any other favorite browser of yours in the system.
Step 6: Next, type the important IP address ie 192.168.188.1 as the URL.Step 7: This will open the login screen, or sometimes, the setup wizard for the extender depending upon the brand.
Step 8: In both, the first step is completing the signup process using the default username and password.
Step 9: Check the default username and password on the extender, and enter them in the login fields.
Step 10: Click on the Sign In or Login button and reach the admin dashboard.
Step 11: Now, the list will open for the main existing networks in your range.
Step 12: Select the name of wifi network which you want to extend and click on the Next button.Step 13: Then, enter the password for the selected WiFi network and complete the connection.
192.168.188.1 Access | Wifi Repeater Setup